R01: HTML and CSS Fundamentals
Written by Ajay Gandecha for COMP 426: Modern Web Programming.
Introduction
COMP 426: Modern Web Programming will focus on creating websites and web applications. We will use a lot of advanced tools throughout the course - but the most fundamental tools of web development are HTML and CSS.
The files that make up websites are stored on servers - computers on the internet that store large amounts of files and "serves" them to users who request them. When you navigate to a website, say the course website (https://comp426-25s.github.io/), your browser sends a request across the internet to the server that stores the website's files. The server then sends the files to the browser, which renders the website for you to see. The files that the server sends back to the browser have specific jobs.
Think about any website you visit on the internet. We can break every website into three fundamental parts:
- Content: All webpages have content - this includes text, images, links, etc. that you see on the website.
- Style: The style of a website is how the content is presented to the user. This includes the colors, fonts, spacing, and layout of the content. Multiple webpages may share the exact same content, but can be styled differently.
- Behavior: The behavior of a website is how the website responds to user interactions. This includes animations, forms, and other complex logic such as logging in, storing / manipulating data, and more.
The different files that the browser receives from the server provide these three fundamental parts of the website - content, style, and behavior. The content of a website is defined using HTML (.html) files. The style of a website is defined using CSS (.css) files. The behavior of a website is defined using JavaScript (.js) files. In this reading, we will focus on the first two parts - HTML and CSS.
HTML Fundamentals
HTML (HyperText Markup Language) is a markup language used to specify the content and structure of webpages. When we load any webpage from the internet, our browser recieves an HTML file from the server. The browser then renders the webpage based on the content that the HTML file specifies. We can also open these files (ending in .html) directly on our computer using a browser.
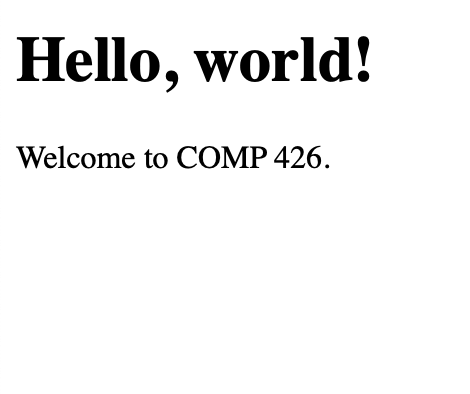
Below on the left is a sample HTML file. On the right is the website it produces:
<!DOCTYPE html>
<html lang="en">
<head>
  <title>Home</title>
</head>
<body>
  <h1>Hello, world!</h1>
  <p>Welcome to COMP 426.</p>
</body>
</html>
HTML documents are made up of HTML Elements. Elements are the essential building blocks of our website and specify items such as headings, paragraphs, images, links, and more.
HTML Tags
Elements are denoted using tags. Tags are enclosed in angle brackets (< and >), and the text between these brackets denotes the element's type. There is one opening tag and one closing tag for every element. The closing tag is the same as the opening tag, but with a forward slash (/) before the element type. The opening tag denotes the start of the element, and the closing tag denotes the end of the element. The space between the opening and closing tag represents the content of the element.
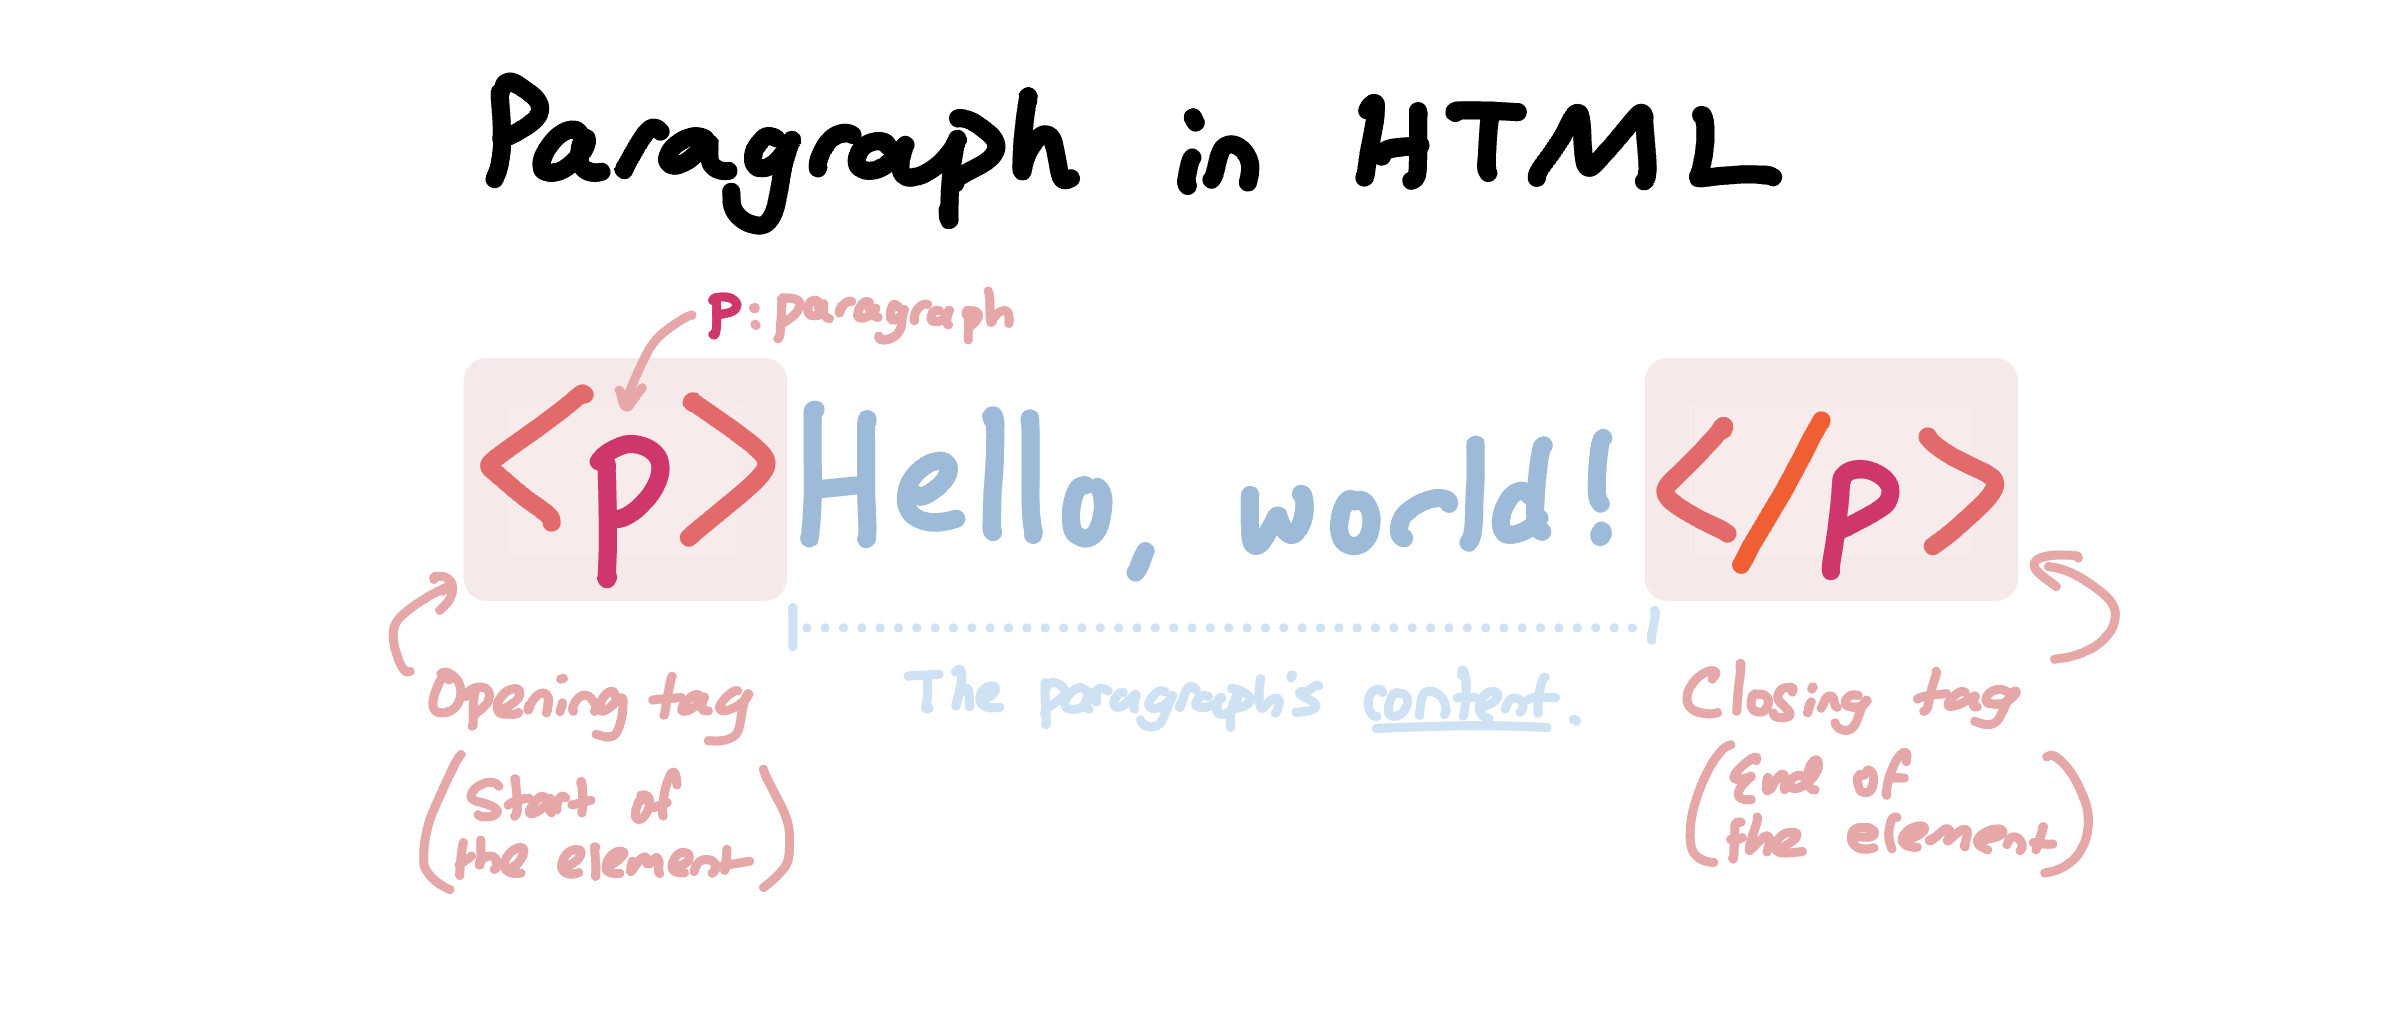
The content of elements may include plain text. For example, as shown in the image above, a paragraph's content would include the paragraph's text. HTML elements can also be nested within each other - meaning that another HTML element can be used in the content of another element.
For example, the <strong> element is used to denote boldfaced text. For example, we can bold the text "world" in the paragraph above like so:
<p>Hello, <strong>world</strong>!</p>
In this example, the <strong> element is nested within the <p> element. The text "world" is bolded because it is the content of the <strong> (bold text) element. This nesting of HTML elements is a powerful concept that will allow us to create the many complex designs found in modern webpages.
HTML elements can also be modified with attributes. Attributes provide extra information to change an element's behavior or appearance. For example in HTML, we use the <a> anchor element to create links. The content of the <a> element is the text that will be displayed as a link, rather than the link itself. To add the destination link for a link element, we can attach the href attribute to the <a> element:
<a href="https://comp426-25s.github.io/">Click me!</a>
This HTML creates the following element: Click me!
Many different types of HTML elements take specific attributes that pertain to their specific purposes. For example, the <img> image element takes a src attribute that specifies the image's source URL.
An Aside:
We can add comments to our HTML code using the following syntax:
<!-- This is a comment -->.
You will see these comments throughout many of the following examples as well as in future files and assignments we will work on in this course.
HTML File Structure
HTML files have a specific structure that we must follow in order for the browser to correctly render the webpage.The structure of an HTML file is as follows:
<!DOCTYPE html>
<html>
  <head>
      <title>Page Title (Appears on the tab in the browser)</title>
      <!-- Additional metadata and links to external resources -->
  </head>
  <body>
      <!-- All of the website's content goes here. -->
      <p>Hello, world!</p>
  </body>
</html>
The main parts of an HTML file are:
<!DOCTYPE html>: First tag in an HTML file that tells the browser that the document is an HTML5 document.<html>: This element is always the root element of the HTML document. All other elements are nested inside of it.<head>: Contains metadata about the HTML file, such as the website's title and links to external resources (we will discuss this soon).<body>: Contains the content of the webpage that will be displayed to the user. Place all HTML elements to display on the website here.
You can see this run live in the browser! Below is an embed of StackBlitz, a tool that allows us to run websites directly in the browser. We will use StackBlitz for many live demos in the future. You can also edit the site live and watch it update in real-time!
Note: The live preview of this website might only work on Chrome-based browsers. Please consider continuing this reading in Chrome if the preview on the right-hand side does not load!
Common HTML Elements
There are numerous HTML elements that are essential for creating webpages. Below is a reference of the most common ones to familiarize yourself with:
<tag> | Description |
|---|---|
<h1> to <h6> | Displays headers with various prominences (sizes), with <h1> being the largest header and <h6> being the smallest header. |
<p> | Displays a paragraph of text. |
<div> | Container that groups elements together in a block. This element is one of the most commonly-used and important for building layouts. |
<span> | Container that groups elements together in-line. Often used to apply styling to specific text inside of a paragraph without causing any line breaks. |
<em> | Textual content inside of this element is italicized. |
<strong> | Textual content inside of this element is bolded. |
<br> | Creates a line break in a paragraph. |
<a href="url"> | Creates a link to another webpage. |
<img src="url"> | Displays an image from a given url. |
<ul> | Creates an unordered (bulleted) list. Content inside of this element should be a list of <li> elements. |
<ol> | Creates an ordered (numbered) list. Content inside of this element should be a list of <li> elements. |
<li> | List items to be placed inside of lists (either <ul> or <ol>). |
<table> | Used to create tables, in combination with <tr> (table row), <th> (table header cell), and <td> (table data cell) elements. For more information on how to create tables in HTML, check out this documentation! |
To learn more about all of the HTML elements, check out this official documentation from Mozilla.
Multiple HTML Files in a Website
HTML files can link to other HTML files to load different pages on a website. This is done using the <a> link element. By convention, we use the index.html file for the homepage of a website. This file is loaded when a user navigates to the website's root URL. For example, if a user navigates to https://example.com/, the browser will load the index.html file and display it to the user.
For example, if we created another HTML file called about.html, we could link to it from the index.html file like so:
<a href="another-page.html">Another page</a>
The project structure would look like this:
website
├── index.html
└── another-page.html
Note on File Paths:
The href attribute uses relative paths to link to other files. In this case, the href attribute is set to another-page.html, which means that the browser will look for the another-page.html file in the same directory as the index.html file. If we were instead given the following project structure:
website
  ├── index.html
  └── pages
      └── another-page.html
We would need to update the href attribute to look like:
<a href="pages/another-page.html">Another page</a>
If were inside of another-page.html and wanted to link back to index.html, we would use the following href attribute:
<a href="../index.html">Back to Home</a>
To learn more about relative vs. absolute paths, click here.
CSS Fundamentals
As you noticed through reading above and also playing around with HTML, the content of the webpage is very bare-bones. HTML provides us with the skeleton of a webpage, but it does not provide us with the tools to style the webpage. This is where CSS comes in.
CSS (Cascading Style Sheets) is a language used to specify the style and layout of webpages. CSS is used to control the appearance of HTML elements on a webpage, such as the color, size, and position of text and images. When we combine HTML and CSS, we unlock the ability to create rich, aesthetically pleasing websites that resembles the modern webpages we see on the internet today.
CSS files are denoted with the .css file extension and are separate files from the HTML files. We are able to use the <style> tag in the <head> section of our HTML files and write CSS there, however since our CSS files can be long and include a lot of styling, it is best practice to separate the CSS into its own file. We can then link the CSS file to the HTML file using the <link> tag in the <head> section of the HTML file like so:
<!DOCTYPE html>
<html>
  <head>
      <title>Page Title</title>
      <!-- This element links the CSS file to the HTML file. -->
      <link rel="stylesheet" type="text/css" href="styles.css">
  </head>
  <body>
      <!-- The webpage's content is now styled using the styles.css file. -->
      <p>Hello, world!</p>
  </body>
Typically, styles are placed in the styles.css file. Here is an example file directory of a project, building on the one from the previous section:
website
├── index.html
└── another-page.html
└── styles.css
CSS Rules and Selectors
CSS files contain styling "rules" / rulesets that describe how certain HTML elements should be styled. Rules consist of two main parts:
- Selector - The selector specifies which HTML elements the style should apply to.
- Style Rules - Following the selector, surrounded by
{ }, are the style rules that specify how the selected elements should be styled. Style rules consist of a style property and a value, separated by a colon.
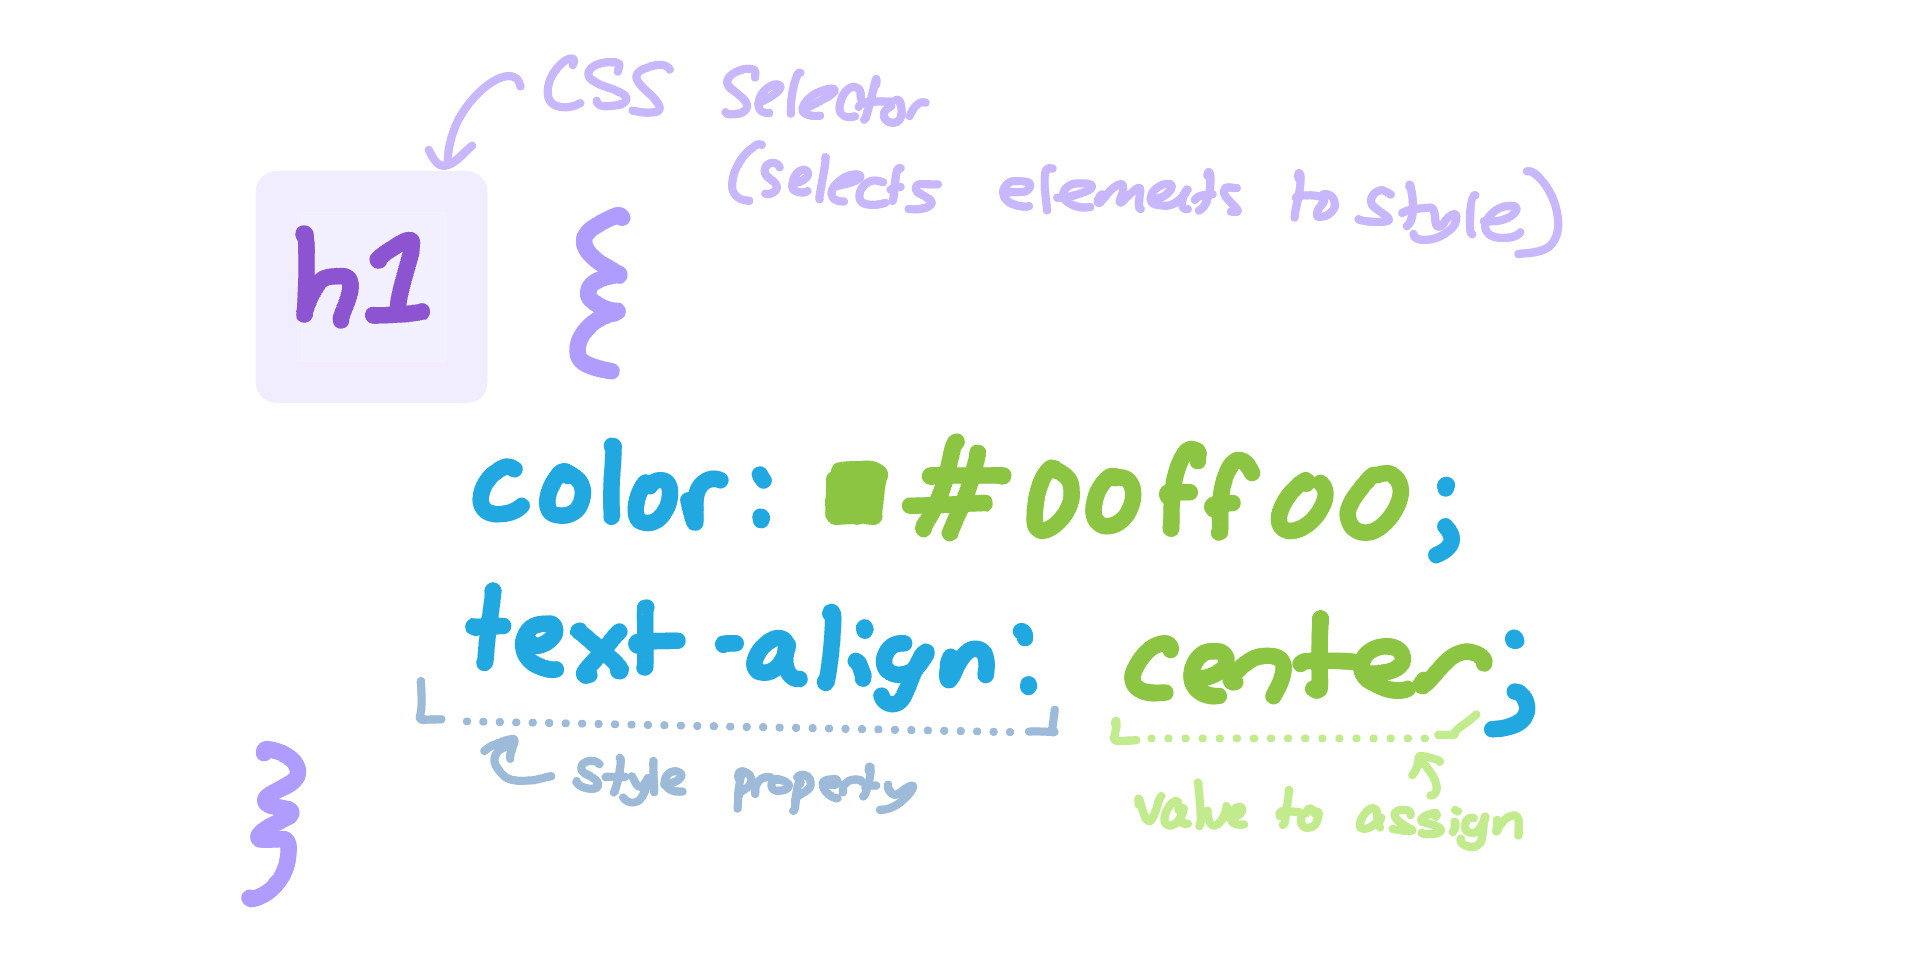
We can place an entire HTML element as a selector, like we have above with the h1 element. With this styling rule, all h1 elements on the webpage will be styled according to the styling rules.
There are many cases where we want to style only specific elements on the webpage. We can do this by using special class and id selectors.
We discussed certain HTML elements using attributes to provide extra information to the element. For example, we used href with <a> elements to supply a link's destination URL, or src with <img> elements to supply an image's source URL.
There are two selectors which can be applied to all HTML elements - class and id.
The class attribute is used to apply a class to an HTML element. Classes are used to group elements together. For example:
<p class="my-class">Sample element!</p>
<p class="my-class">Another one!</p>
<p>This paragraph is not part of the class.</p>
<h2 class="my-class">Multiple types of elements can be in one class.</h2>
We then can select all elements that share the same class using a the .class CSS selector.
<p class="my-class">Sample element!</p>
<p class="my-class">Another one!</p>
<p>
  This paragraph is not
  part of the class.
</p>
<h2 class="my-class">
  Multiple types of elements
  can be in one class.
</h2>
/* Styles all p elements */
p {
  text-align: center;
}

/* Styles all elements with the
class 'my-class' */
.my-class {
  color: blue;
}
We can also use the id attribute to attach a unique identifier to HTML elements. This allows us to style individual elements. We can select elements with a specific id using the #id CSS selector.
<p>Sample element!/<p>
<p id="another">Another one!</p>
/* Styles just the second
paragraph element. */
#another {
  color: blue;
}
CSS Styles
There are hundreds of different types of CSS styles that can be applied. I recommend checking out this resource to learn more! We will specifically talk about layout-centric styles in lecture.
The basics of CSS are super easy to learn, but since CSS contains a large depth of styling options, it can take time to master. Throughout this course, if you have questions about how to achieve a specific style, we highly recommend checking documentation online or stopping by to office hours - we would love to help!
Wrapping up
In this reading, you learned about the basics of HTML and CSS - two of the most fundamental tools used for building websites! Make sure to answer the associated questions for this reading in GradeScope. Please see us in office hours if you have any questions!